This article is a set of complete instructions on how to link a Microsoft Access database front to an MYSQL database hosted on a webserver. We start you from ground zero and build it up to the top. These are the following steps:
- Install MYSQL Connector/ODBC driver
- Create a User DSN (Data Source Name)
- Use Microsoft Access to create linked tables to the MYSQL database
The reasons why you need to connect to an MYSQL database
One way to increase the performance of an Access database is to migrate the data on to an MYSQL database. Right out of the box, Access databases have certain limitations. For example, an Access database can’t grow beyond 2GB of data and can probably serve about 20 people at the same time under reasonable workloads. Even with these limitations, an Access database is an excellent working option for small teams to collaborate on a digitalised workflow. As the Access database starts to grow in size and number of users, a natural growth path is to migrate the existing data from Microsoft Access to MYSQL. To do this, you probably will need the help of an Access database developer who has the technical knowledge to do this.
So your Access database developer has finished migrating all your Access database tables into an MYSQL database hosted somewhere on the internet. For you to start accessing the data using the Access database frontend, you will need to create linked tables to the MYSQL database. Your Access developer can perform this task for you, but if you like to empower yourself it is not too difficult to do this. But before you dive into the specifics you must get 4 pieces of information from your Access database developer who migrated you. Without it, you won’t be able to connect to the MYSQL database. Write it down somewhere. You will need it when I go through step 2.
- Information 1: TCP/IP Server,
- Information 2: User Name,
- Information 3: Password,
- Information 4: Database name.
Step 1: Install MYSQL Connector/ODBC driver
You will start by installing the MYSQL Connector/ODBC driver. It can be downloaded for free from this link https://dev.mysql.com/downloads/connector/odbc/.
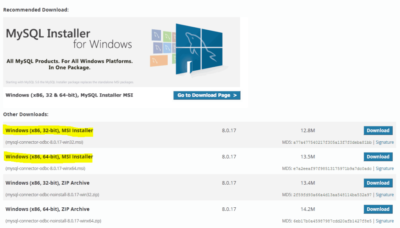
Choosing the right file to download and install can be confusing because there are two versions of it. A 32-bit and a 64-bit version. The right version to install needs to match with the bit version of your Microsoft Access database or Access Runtime. For example, if you have the 32-bit Microsoft Access software or Access Runtime installed, then choose the 32-bit MYSQL Connector/ODBC driver. The MYSQL Connector/ODBC driver works as an interpreter to allow a Microsoft Access database to communicate with an MYSQL database.
Step 2: Create a User DSN (Data Source Name)
Once you have the MYSQL Connector/ODBC driver installed, you need to create a Data Source Name or DSN to connect your computer to the target MYSQL database residing in the web-server. On your Windows Search, search for “ODBC”. You need to choose between creating a 32-bit or 64-bit ODBC data source. The bit version of the data source needs to match with the bit version of your Microsoft Access database or Access Runtime.
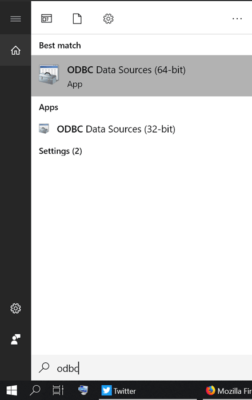
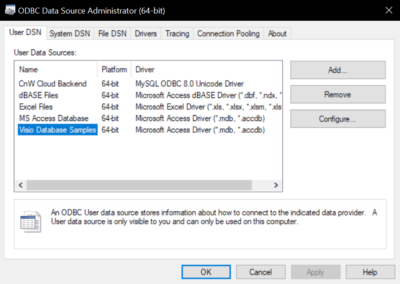
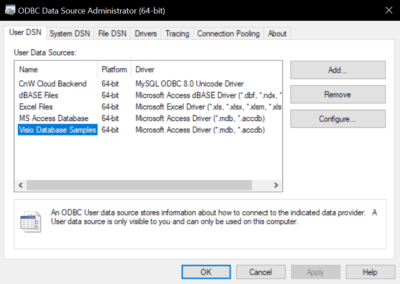
Once you see the ODBC Data Source Administrator, stay on the User DSN tab and click the Add button.
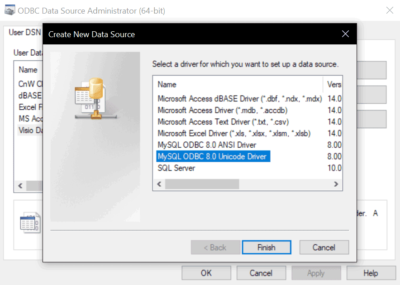
In the Create New Data Source window, choose MYSQL ODBC Unicode Driver and click Finish.
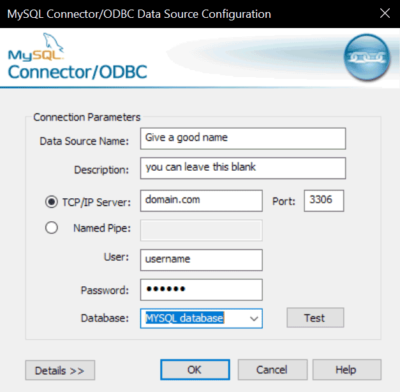
In the next screen fill in these fields: Data Source Name: Give any name you like. Description: you can leave this blank. TCP/IP Server: Get this from your Access database developer. Port: 3306 Password: Get this from your Access database developer. Database: Get this from your Access database developer. Click Ok.
Step 3: Use Microsoft Access to create linked tables to the MYSQL database
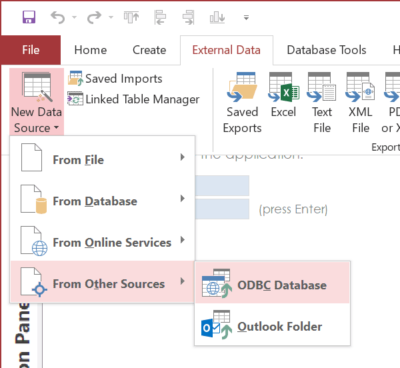
Once a User DSN has been created, you will need to linked the Access database application to the User DSN. Open the Access database and click External Data->New Data Source->From Other Sources->ODBC Database.
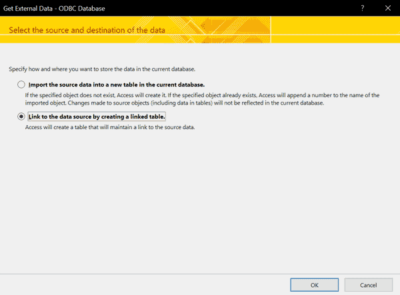
Next, choose Link to the data source by creating a linked table.
In the Select Data Source window, click on the Machine Data Source tab and select the User DSN you had created. Click OK.
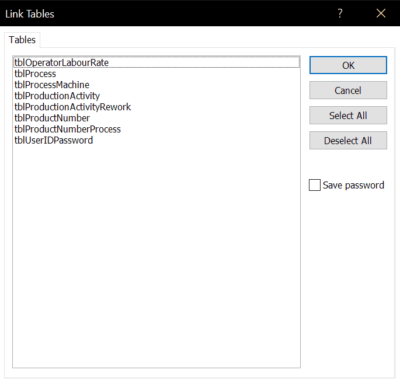
And finally, in the Link Tables window, click on Select All and OK!
Summary
To link an Access database frontend to an MYSQL backend database, you need to perform 3 major steps. The first step is to install an MYSQL Connector/ODBC driver. Essentially this software acts as an interpreter between an Access database and an MYSQL database. The second step is to create a Data Source Name (DSN). A DSN represents the MYSQL database located in a specific webserver within the vast internet. The last step is to connect the Access database frontend to this DSN and finally linked up all the internal tables to the Access application.
About Aeternus Consulting
Aeternus Consulting is a digital creative agency. We create compelling infographics to help clients reach a wider audience.

Related Link: Infographics Design Service in Singapore


One Response
Thank you for such a thorough, concise and thoughtful tutorial. It has made an otherwise complex process simple for a non-techie. My compliments to the author.